Ever wondered what happens after you submit your custom pin design? The journey from digital artwork to finished enamel pin involves precision engineering, specialized machinery, and multiple quality control checkpoints that most customers never see. Having manufactured thousands of custom pins since 2008, we've refined our process to deliver consistent quality while maintaining the speed that modern brands demand.
The pin manufacturing process reveals why custom pins have become such powerful marketing tools. Pins are not just printed accessories but engineered products built to last years while maintaining their visual impact.
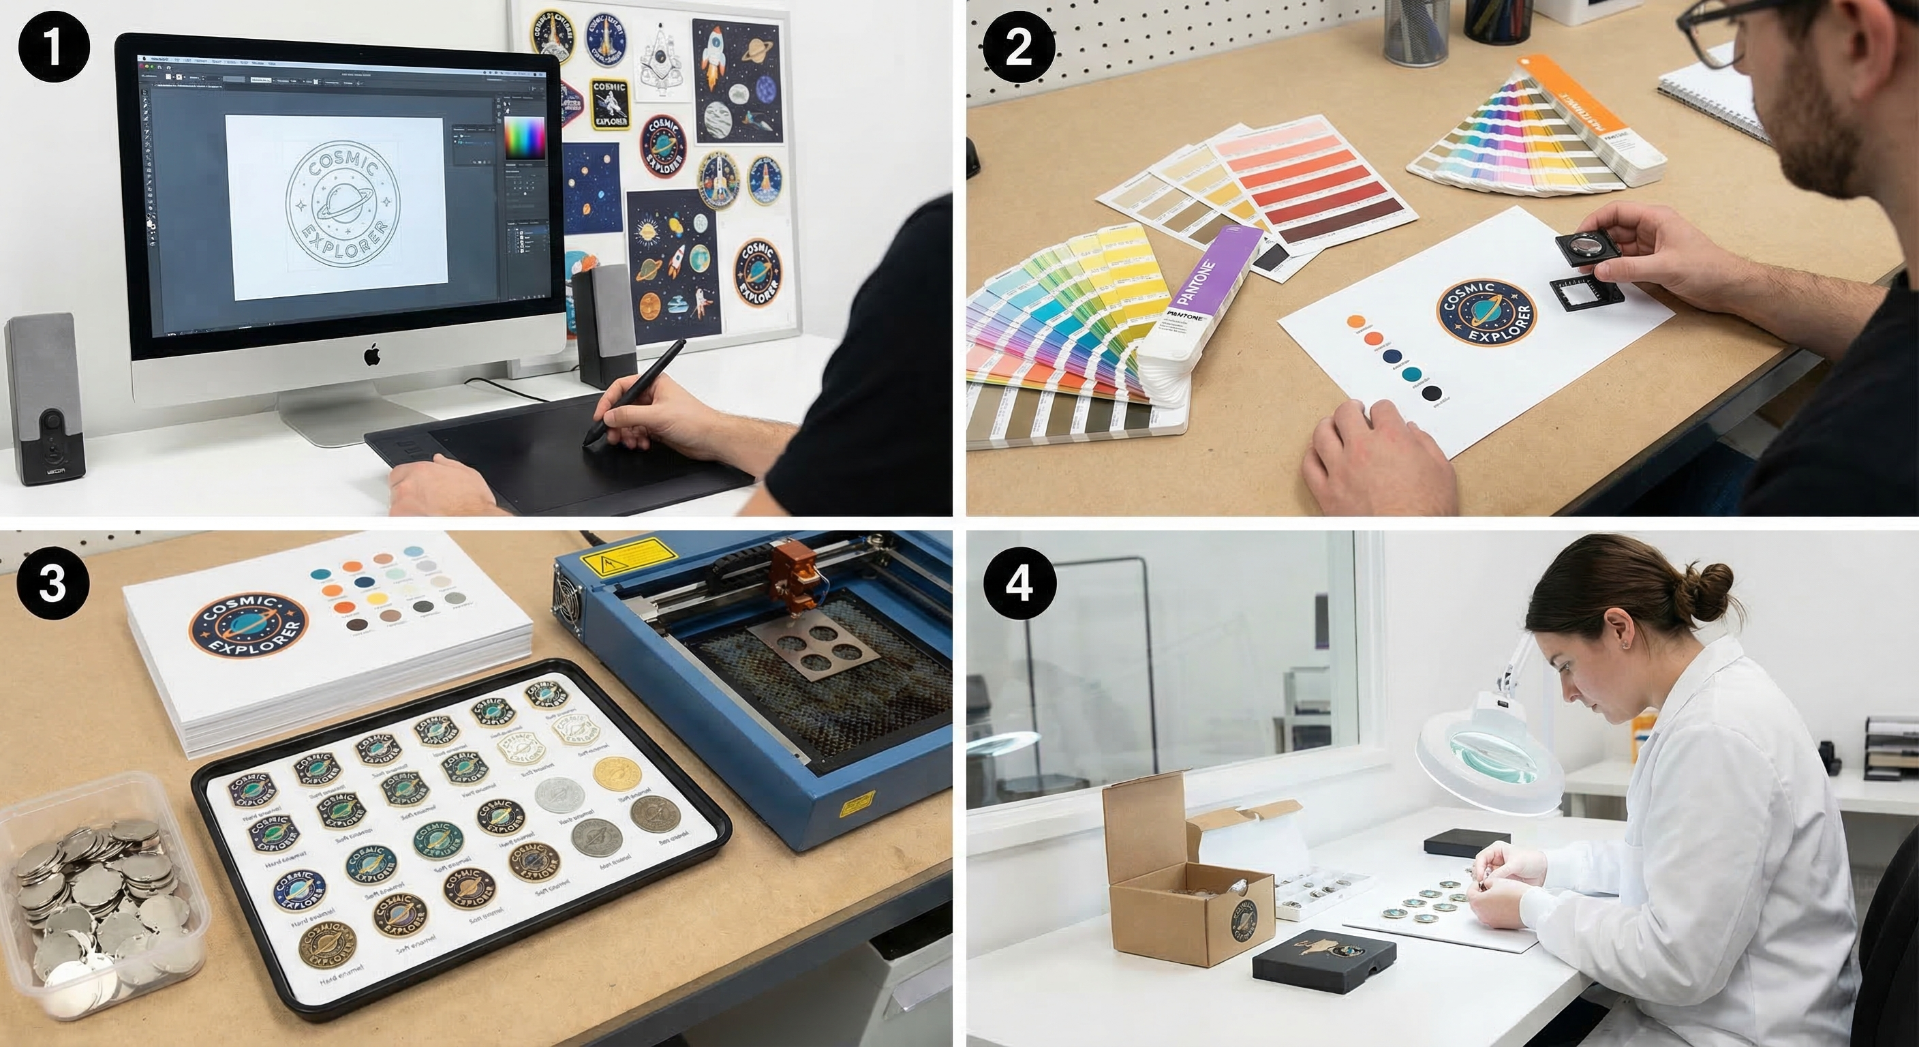
Stage 1: Design Engineering and Technical Review
Before any metal is cut or enamel is mixed, our design team conducts a technical review that determines whether your artwork will translate successfully into pin form. This isn't about artistic merit — it's about the physics of metal working and enamel application.
Line weight analysis ensures all design elements will be clearly defined in the final product. Lines thinner than 0.5mm often disappear during the metal stamping process, while very thick elements may not fill evenly with enamel. We adjust line weights to optimize for the manufacturing process without changing your design's visual impact.
Color separation involves analyzing your artwork to determine how many enamel colors are required and whether they can be applied without bleeding into adjacent areas. Each color requires its own raised metal barrier, which affects both the stamping die design and final production costs.
Size optimization considers how your design elements will appear at the intended pin size. Details that look crisp on a computer screen may not be as clear at 1-inch pin size. We often recommend size adjustments or design simplification to ensure maximum visual impact.
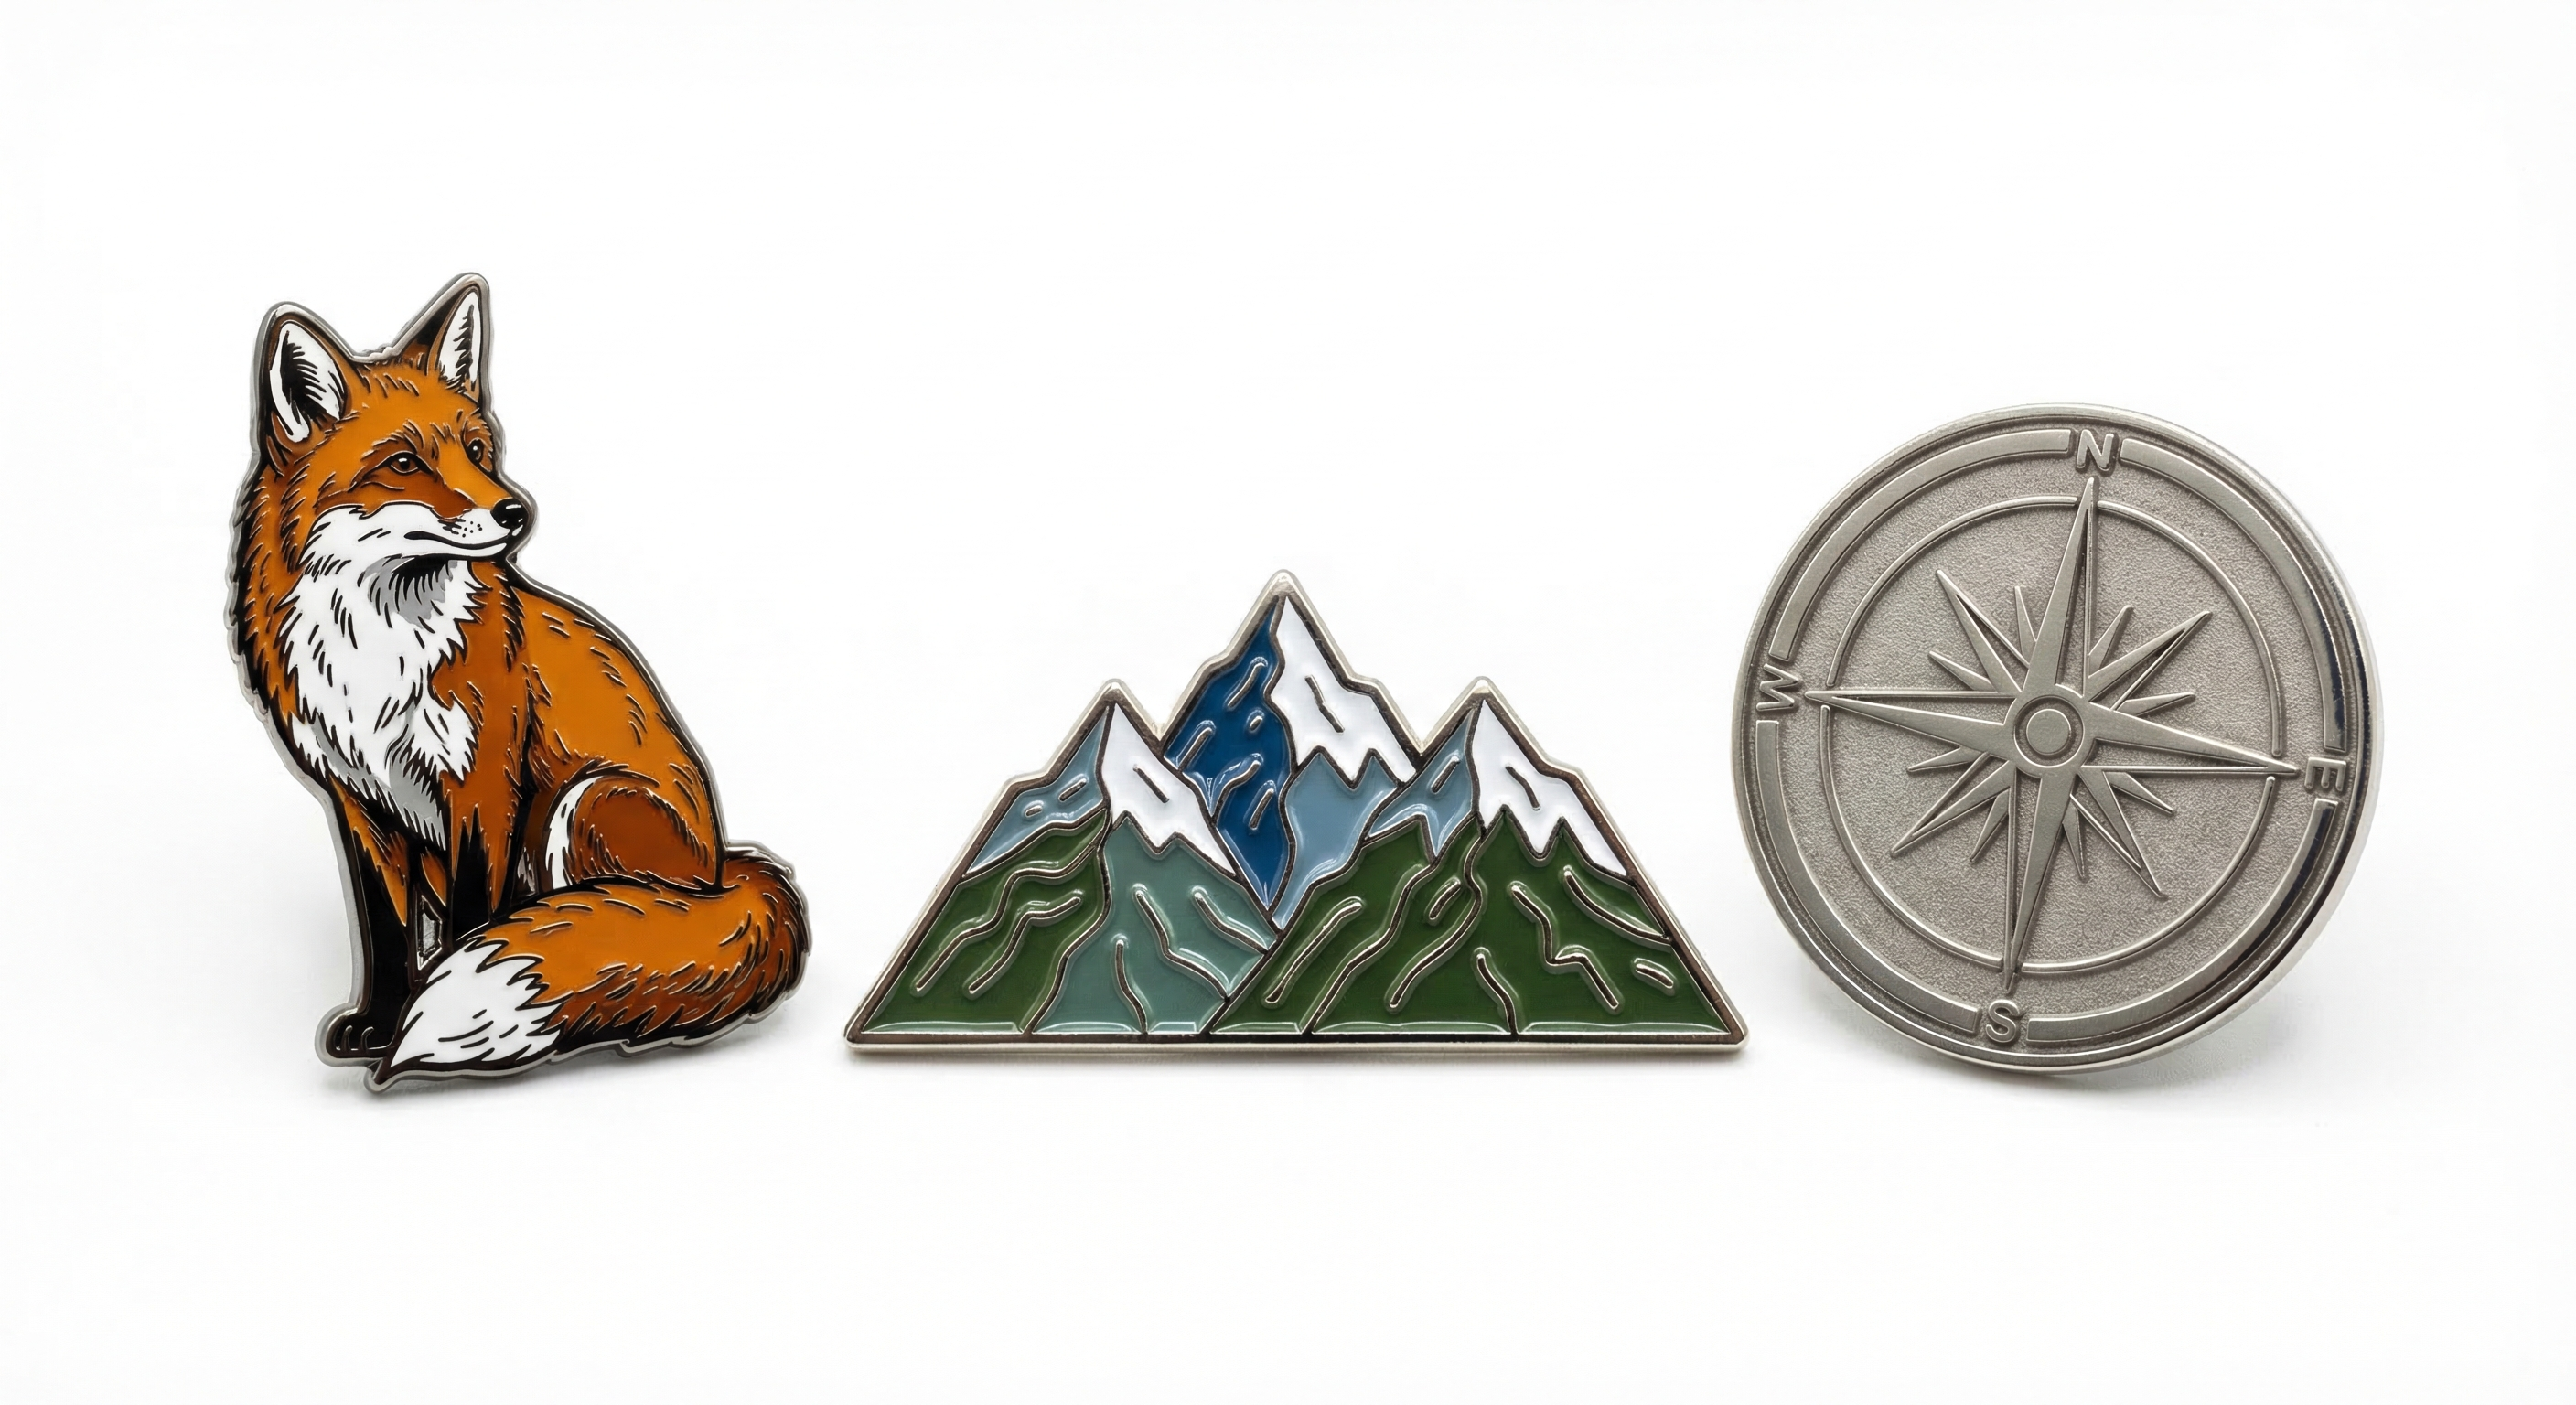
The engineering phase also determines the optimal pin style for your design. Hard enamel works best for designs with solid color areas and clean lines. Soft enamel accommodates more complex designs with fine details. Die struck pins (no enamel) work well for monochromatic designs that rely on metal texture and dimension. If neither of these options work for your design, don’t worry, we also offer a printed option that has more capability for finer details and gradient colors.
Stage 2: Die Creation and Metal Stamping
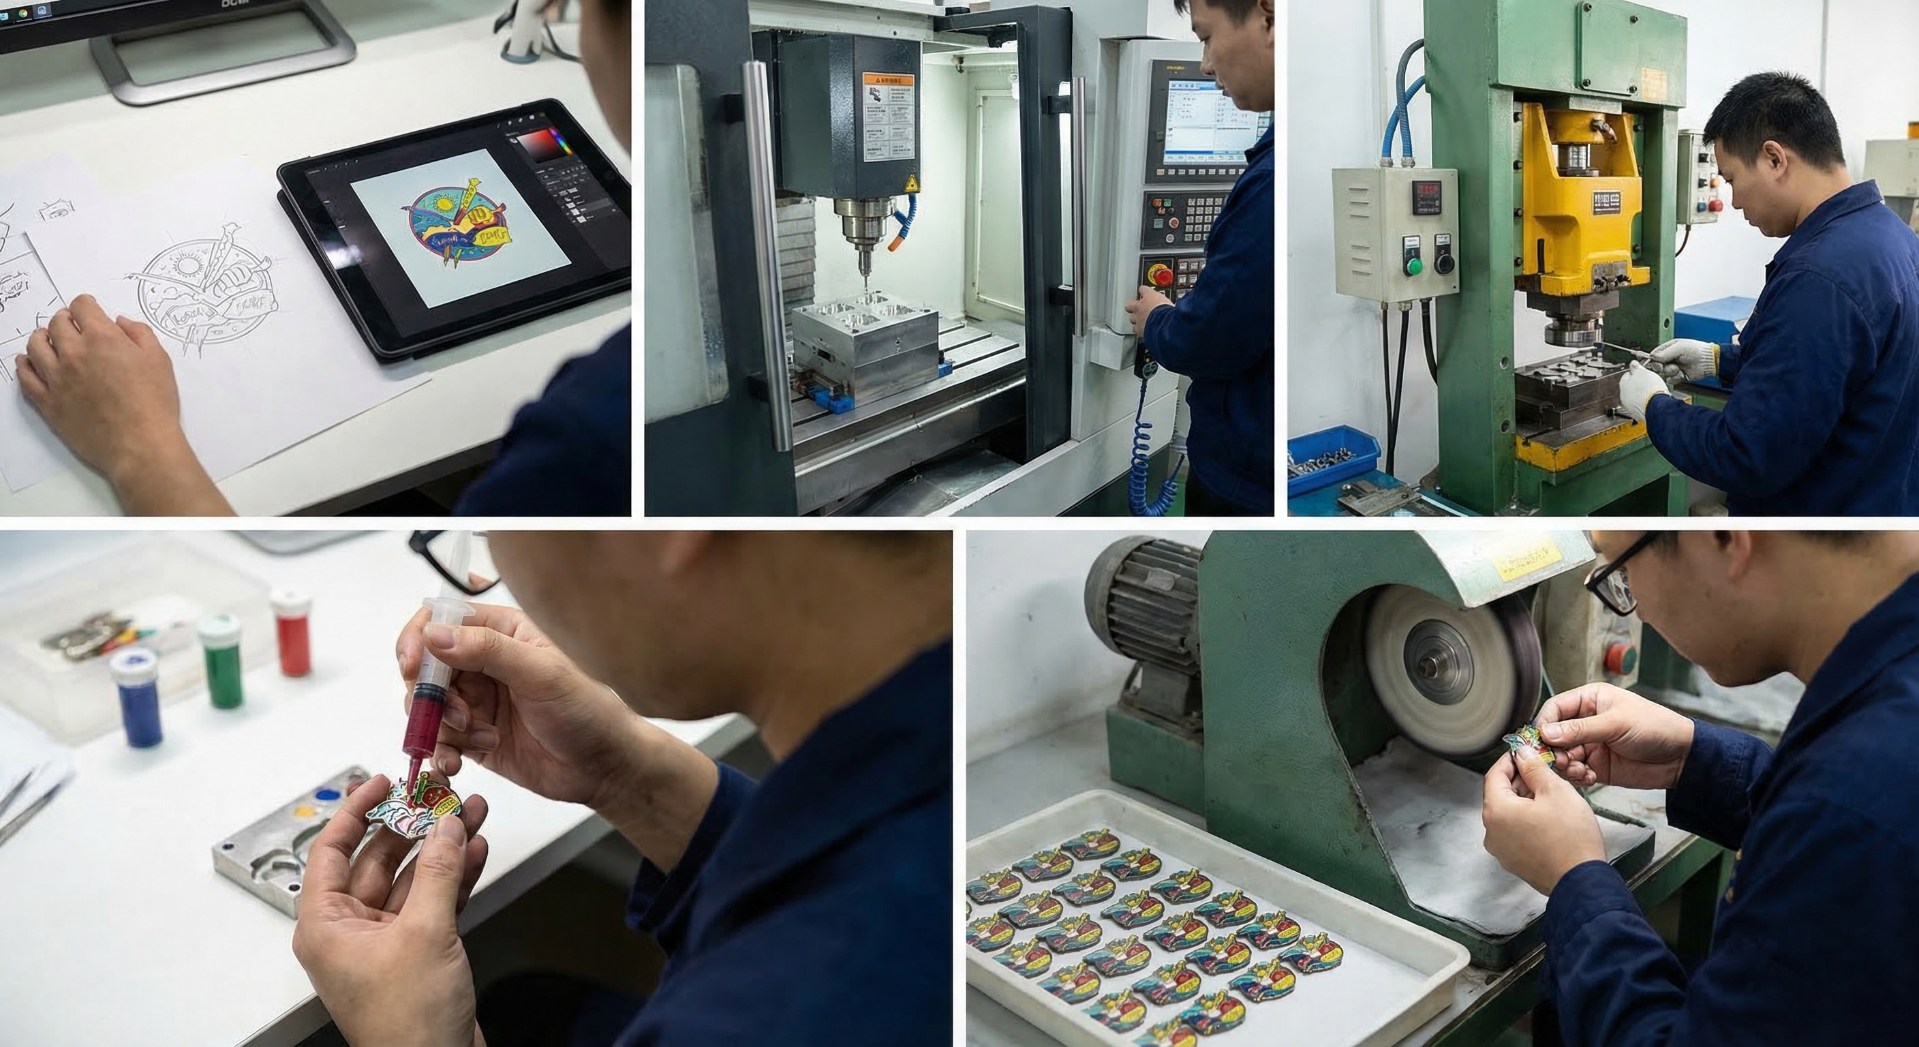
Die cutting represents the most critical phase of pin manufacturing. Steel dies are precision-machined to create the raised and recessed areas that will define your pin's final appearance. Each die is essentially a custom tool created specifically for your design — it can only be used to make your pins and cannot be modified for other designs.
The steel used in die creation must withstand thousands of stamping cycles while maintaining precise detail. We use tool-grade steel that's been heat-treated to specific hardness levels. Too soft, and the die wears quickly, leading to inconsistent pin quality. Too hard, and the die may crack under the extreme pressures of the stamping process.
Metal selection affects both appearance and durability. Most custom pins use copper or iron as the base metal. Copper provides superior detail reproduction and corrosion resistance but costs more than iron. Iron pins are more economical and work well for large-quantity promotional applications.
The actual stamping process uses hydraulic presses applying several tons of pressure to force the base metal into the die's shape. Each pin blank requires multiple strikes to achieve full detail depth. The metal flows into every groove and raised area of the die, creating the three-dimensional structure that will hold the enamel colors.
Quality control at this stage involves measuring metal thickness, checking detail reproduction, and ensuring consistent stamping pressure across the entire production run. Variations in pressure or metal thickness affect enamel adhesion and final appearance.
Stage 3: Plating and Surface Preparation
Before enamel application, pin blanks undergo electroplating to create the base finish that will show through the enamel and around design edges. Plating options dramatically affect the final pin appearance and cost.
Gold plating provides the most premium appearance but requires multiple plating layers for durability. We apply a copper base layer, then nickel for corrosion resistance, and finally gold for appearance. Imitation gold is typically used because it is a cheaper option, but real gold finishing is available if requested. Each layer requires precise thickness control — too thin, and the underlying metals show through; too thick, and fine details become soft.
Silver plating offers excellent appearance as well. The process is similar to gold plating but uses nickel as the final layer as this is more cost effective than real silver, but again real silver finishing is available upon request. Silver plating works particularly well for designs with cool color schemes or corporate applications where gold might appear too flashy.
Nickel plating provides a neutral silver appearance at the most economical cost. Single-layer nickel plating is sufficient for many promotional applications, though it may tarnish over time with exposure to skin oils and environmental conditions.
Antique finishes require additional processing steps to create the aged appearance. After standard plating, pins are treated with oxidizing solutions that darken recessed areas while leaving raised surfaces bright. This process requires careful timing — too little oxidation and the antique effect is subtle; too much and details become obscured.
Stage 4: Enamel Application and Color Matching
Enamel application separates professional pin manufacturing from amateur production. Color mixing begins with Pantone® color matching using specialized enamel paints formulated for metal adhesion and durability. Standard promotional paints used in other applications don't have the adhesion properties or color stability required for long-term pin durability.
Hard enamel application involves filling the recessed areas of the stamped pin with liquid enamel, then heating to 1,500°F+ to cure and harden the enamel. Multiple thin coats produce better results than single thick applications. Each coat must be completely cured before applying the next layer.
The curing process transforms the liquid enamel into a glass-hard surface that's extremely durable but also unforgiving of mistakes. Dust particles, color bleeding, or temperature variations during curing create defects that require complete pin re-manufacturing to correct.
Soft enamel application uses lower-temperature curing that leaves the enamel slightly below the metal surface. This creates the characteristic textured feel of soft enamel pins while allowing for more complex color work and easier defect correction.
Color consistency across large production runs requires careful batch control and regular color matching throughout production. Environmental conditions affect enamel flow and curing, so temperature and humidity must be controlled throughout the application process.
Stage 5: Quality Control and Finishing
Polishing and surface finishing removes excess enamel and creates the smooth, professional appearance customers expect. Hard enamel pins require extensive polishing to level the enamel with the metal surface. Soft enamel pins require more delicate treatment to preserve the recessed enamel areas while cleaning the metal surfaces.
Quality inspection involves multiple checkpoints throughout production. Initial inspection checks metal stamping quality and plating consistency. Post-enamel inspection verifies color accuracy, coverage, and surface finish. Final inspection checks overall appearance, attachment hardware, and packaging quality.
Our quality standards reject pins with color variations, surface defects, or dimensional inconsistencies that exceed tight tolerances. This results in higher material costs but ensures that every pin meets professional appearance standards.
Attachment hardware installation happens after all finishing is complete. Pin backing selection affects both cost and functionality. Butterfly clutches are most economical and work well for temporary wear. Locking pin backs provide security for valuable pins or permanent installation. Magnetic backs eliminate pin holes but have weight limitations.
Stage 6: Packaging and Fulfillment
Individual packaging protects pins during shipping and creates a professional presentation for retail or promotional use. Options range from simple poly bags for bulk promotional use to custom presentation boxes for premium applications.
Most customers choose individual poly bags with backing cards for promotional pins, or premium gift boxes for retail sales or employee recognition programs. Custom packaging can include your company branding but requires minimum quantities that make sense primarily for large orders or ongoing programs.
Shipping timing typically requires 2-3 weeks after design approval. International shipping may require additional time for customs clearance, particularly for large quantities or certain destination countries.
Understanding Cost Factors
Pin manufacturing costs reflect the complexity and precision required at each stage. Die creation represents the largest cost component for small orders, which is why prices drop significantly at higher quantities. The die cost is dispersed across all pins in the order, making 100-piece orders much more economical per pin than 25-piece orders.
Plating finish affects both appearance and cost. Real gold plating or real silver plating costs significantly more than nickel or imitation gold. The number of different enamel colors also affects both setup time and material costs.
Reorder Considerations and Design Consistency
Die storage and reorder efficiency provide significant advantages for repeat customers. We maintain your pin dies for 3 years after the last production order, allowing efficient reorders without die recreation costs. This makes seasonal orders, employee recognition programs, and ongoing promotional campaigns much more cost-effective.
Design modifications for reorders require careful consideration. Minor text changes (dates, individual names) can often be accommodated with die modifications. Major design changes typically require new die creation, similar to starting from scratch.
Color consistency across reorders requires maintaining detailed production records. Environmental conditions, material suppliers, and production techniques can all affect color matching over time. Providing sample pins from previous orders ensures accurate color reproduction.
The pin manufacturing process reveals why custom pins have become such effective marketing tools. Custom pins are precision-engineered products that combine artistic design with industrial manufacturing expertise. Understanding this process helps you make better design decisions, set realistic timeline expectations, and appreciate the value that goes into every custom pin.
Ready to see your design transformed into precision-engineered custom pins? Our design team provides free consultation to optimize your artwork for the manufacturing process, ensuring the best possible results while managing costs effectively. With our industry-low minimums and comprehensive manufacturing capabilities, turning your vision into reality is more accessible than you might expect.
The information below is required for social login
Sign In
Create New Account